Terminal UI
Launch the interactive terminal interface with:
noorm ui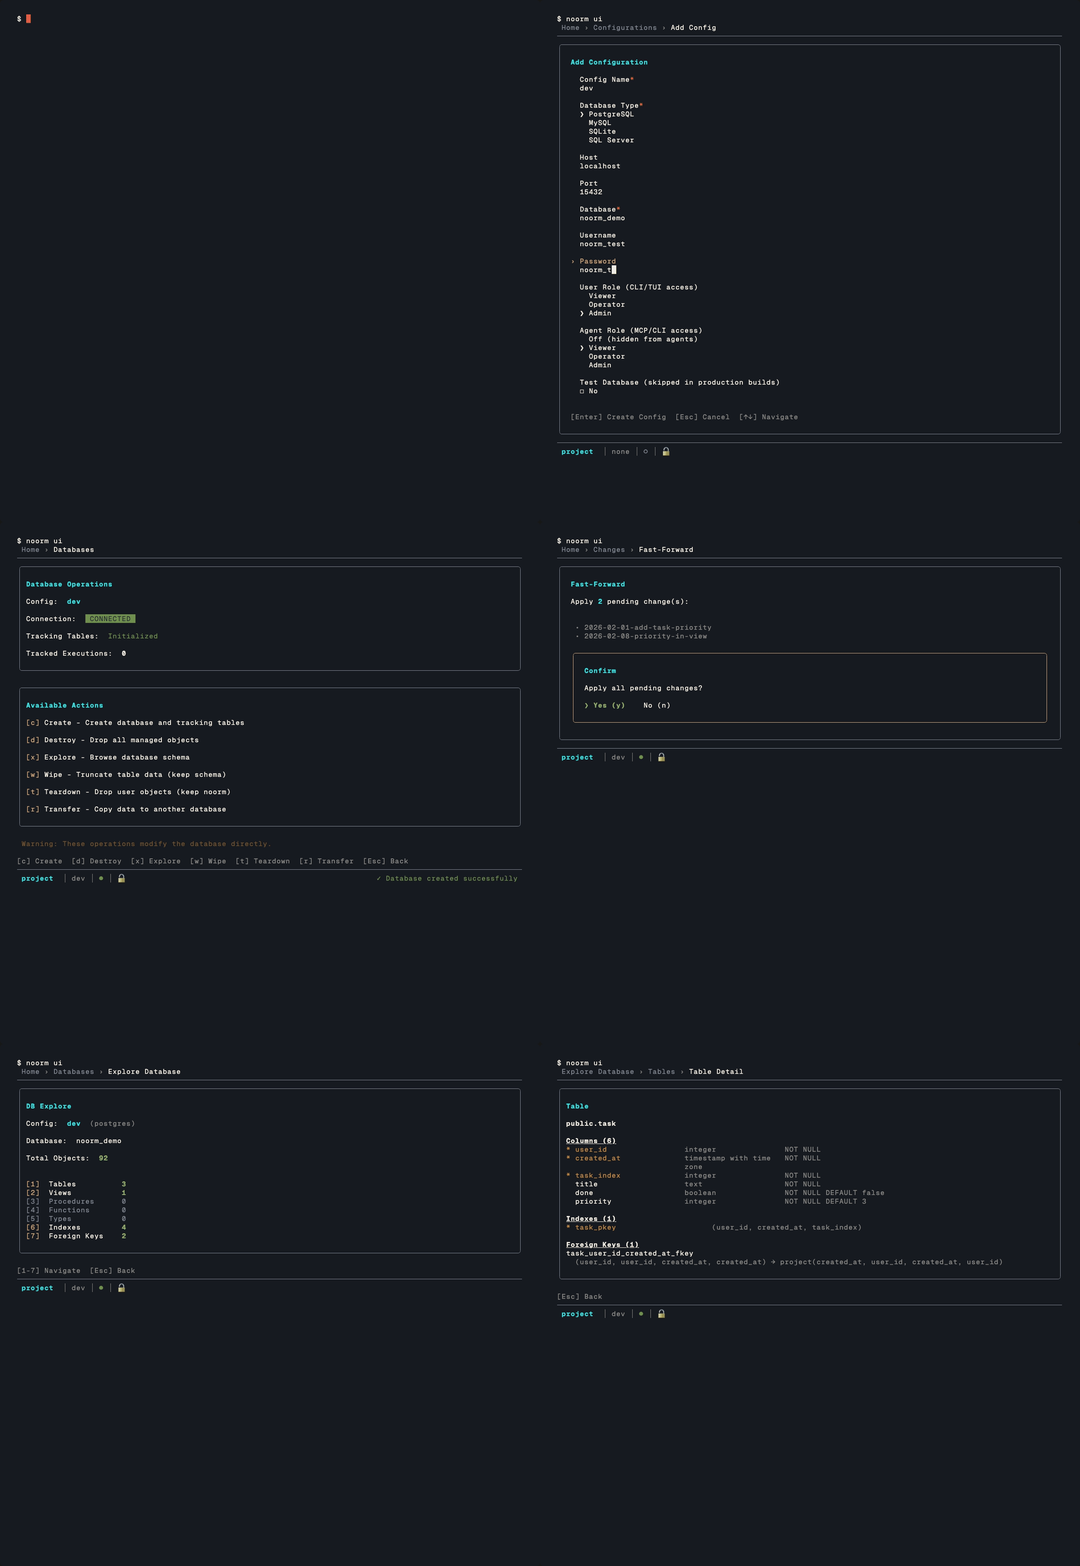
Everything in noorm is accessible through keyboard shortcuts. The mouse works too, in lists and grids — see Mouse if you would rather it did not.
The TUI is a dedicated subcommand — every other noorm command runs as a non-interactive CLI. Running noorm on its own prints the command list (citty's --help) instead of opening the wizard, so the entry into the TUI is always explicit. See the CLI Reference for the headless surface.
Home Screen
Navigation Map
                              ┌─────────┐
                              │  Home   │
                              └────┬────┘
        ┌──────────┬──────────┬────┴────┬──────────┐
        │          │          │         │          │
     [c]│       [g]│       [r]│      [d]│       [s]│
        ▼          ▼          ▼         ▼          ▼
   ┌────────┐ ┌────────┐ ┌────────┐ ┌────────┐ ┌────────┐
   │ Config │ │ Change │ │  Run   │ │Database│ │Settings│
   │  List  │ │  List  │ │  Menu  │ │  Menu  │ │  Menu  │
   └────────┘ └────────┘ └────────┘ └────────┘ └────────┘
        │          │          │         │
        │          │          │         ├── Explore (tables, views...)
        │          │          │         └── Terminal (SQL REPL)
        │          │          │
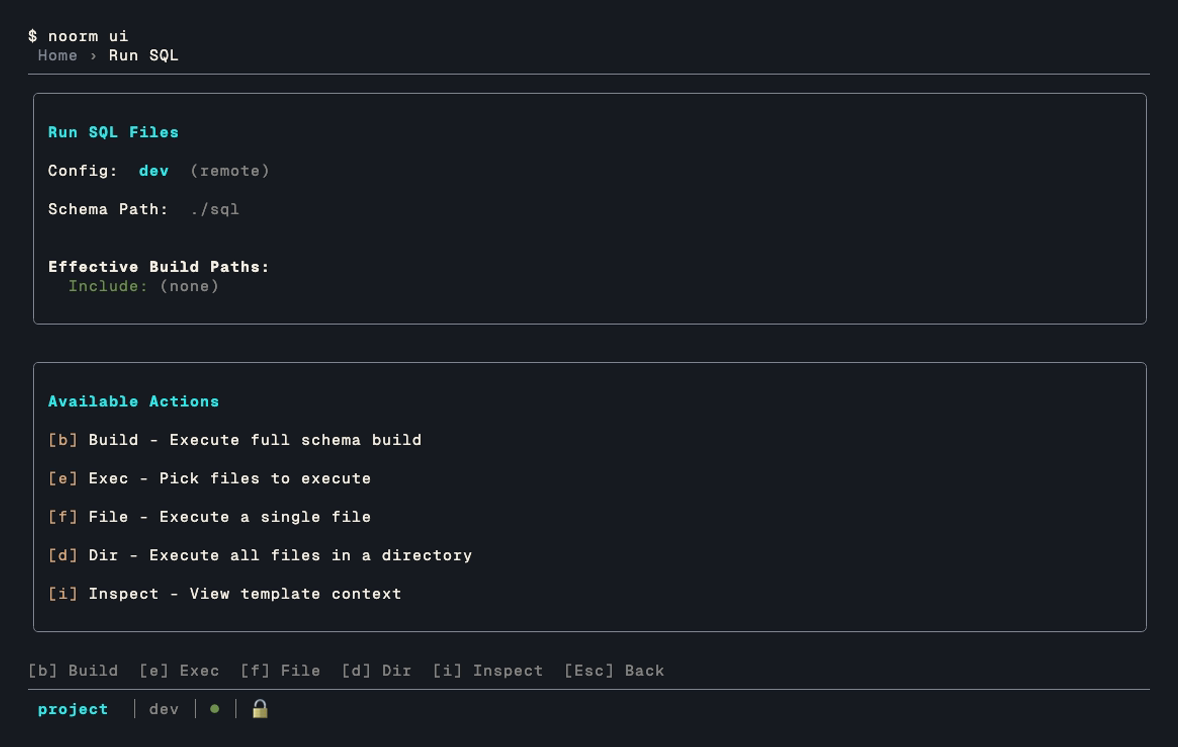
        │          │          └── Build, File, Directory, Exec, Inspect
        │          │
        │          └── FF, Next, Run, Revert, Rewind, History
        │
        ├── Add, Edit, Delete, Copy, Use
        │
        └──[k]── Secrets List
Secrets hang off a config, so k opens them from the Config List, not from Home. Export, import, and validate sit behind [+] More on the Config List.
Keyboard Shortcuts
Home Navigation
| Key | Screen | Description |
|---|---|---|
r | Run | Execute schema files |
c | Config | Manage database connections |
g | Changes | View and apply changes |
d | Database | Explore schema, run queries |
+ | More | Settings, vault, identity, lock |
s | Settings | Project configuration |
v | Vault | Team-shared encrypted secrets |
i | Identity | View/edit your identity |
l | Lock | View/manage database locks |
u | Update | Check for a newer noorm |
q | — | Quit noorm |
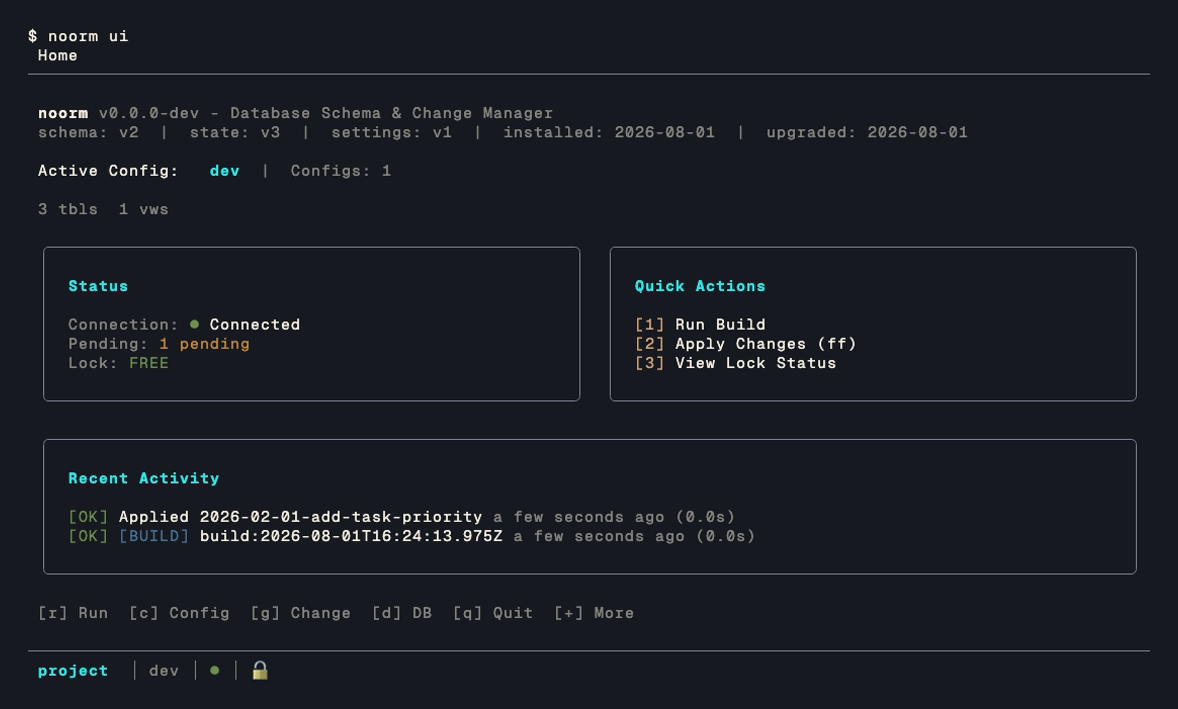
s, v, i, and l work from Home directly as well as from [+] More. Three number keys run the quick actions listed on the home screen:
| Key | Action |
|---|---|
1 | Run build |
2 | Apply changes (fast-forward) |
3 | View lock status |
Per-config secrets are not on this list — they hang off a config rather than the project, so you reach them with k from the config list.
Common Actions (in sub-screens)
| Key | Action | Available In |
|---|---|---|
a | Add new | Config, Changes, Secrets |
e | Edit | Config, Changes, Secrets |
d | Delete | Config, Changes, Secrets |
c | Copy | Config |
k | Secrets | Config (secrets for the highlighted config) |
+ | More | Config (export, import, validate) |
Enter | Use/Activate | Config (set as active) |
Export, import, and validate live behind [+] More on the config list rather than on the list itself, which keeps the destructive and the routine actions apart.
List Navigation
| Key | Action |
|---|---|
↑ | Move up |
↓ | Move down |
Enter | Select |
Escape | Go back |
1-9 | Quick select by number, on lists that show numbers |
Numbered selection is enabled per list — if a list renders numbers down its left edge (Settings and the schema explorer do), the digits work there.
Every list sizes itself to the window, so a taller terminal shows more rows rather than the same fixed count with the rest behind a scroll marker. A list also keeps its cursor when you open an item and come back, so walking a long list one entry at a time does not restart at the top.
Form Navigation
Forms have two modes and Enter switches between them.
| Mode | Key | Effect |
|---|---|---|
| Browse | ↑ ↓ | Move between fields, every field type included |
| Browse | Tab / Shift+Tab | Same, forwards and backwards |
| Browse | Enter | Open the active field for editing |
| Browse | Escape | Cancel the form |
| Edit | Enter | Commit and return to browse |
| Edit | Escape | Restore the value the field held when edit opened |
| Edit | Tab | Commit and move to the next field |
Enter is the mode switch, so submitting is a place you navigate to rather than a key you press:
Past the last field the cursor lands on the action row, where ← → move between the buttons and Enter activates one. The submit button carries the screen's own label, [ Create Config ] on the add-config form.
Two field types never open into edit mode:
- A checkbox toggles in place on
EnterorSpace. - A select expands on
Enter, moves with↑↓, and takes the highlighted option on a secondEnter. Collapsed, it shows its current value on one line like every other field.
A red * after a label marks a required field. Submitting with one empty puts the cursor on it and shows the error beside the value.
Mouse
On by default, in lists and result grids only:
| Action | Effect |
|---|---|
| Click a row | Move the cursor to it |
| Double-click a row | Same as Enter on that row |
| Wheel up / down | Move the cursor one row |
A click acts on whatever already has focus. Clicking a list that is not focused does nothing — it does not move focus there, so the keyboard stays where you left it.
Text selection stopped working
That is this feature, and it is the one thing it costs you. Any terminal mouse-tracking mode hands the mouse to the application, so click-drag selection needs a modifier held down: Option in macOS Terminal and iTerm2, Shift in most others.
If you would rather have plain selection back, turn the mouse off in .noorm/settings.yml:
ui:
    mouse: false
? inside the TUI prints the same line, so you do not have to remember which file it lives in. Nothing else changes: every screen is fully keyboard-driven either way.
Global Shortcuts
| Key | Action |
|---|---|
Shift+L | Toggle log viewer overlay |
Shift+Q | Open the SQL terminal |
? | Show help |
Escape | Go back / Cancel |
Ctrl+C | Quit |
While a text field is taking input (a form field in edit mode, a search box, the SQL editor), Shift+L, Shift+Q, ?, D, and F type their character instead. They work again once you leave the field.
Cancelling a Database Operation
A screen waiting on a database says so, and says that Escape will stop it:
Testing connection... [Esc] CancelThat appears while a config is being tested (add and edit), while the force-release screen checks lock status, and while the SQL terminal connects or runs a query. Escape returns the screen to a usable state; nothing is saved.
Two things are worth knowing about what "cancel" means here:
- The client always stops waiting. The server usually does not stop working. A cancelled query keeps running on PostgreSQL and MySQL only until noorm's cancel request reaches it, and on SQL Server and SQLite it is never told at all. The message names which happened, and the SQL terminal guide has the per-dialect table.
- A connect that answers after you cancelled is closed, not adopted. The screen keeps the state you cancelled into, and the connection is destroyed rather than left half-open.
A connection attempt also ends on its own after 15 seconds, with or without a keypress. Raise connection.connectTimeoutMs for a link that is slow but working.
Screen Reference
Config List
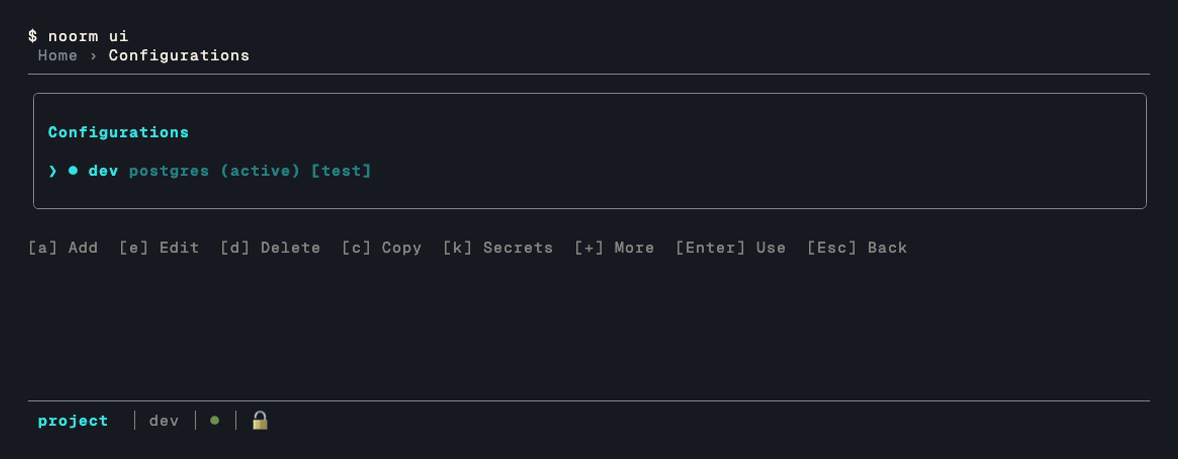
●indicates active config○indicates inactive config>indicates cursor position[user:<role> agent:<role|off>]tag shows access roles for any config whose access differs from the default (user: admin,agent: viewer) — omitted entirely for configs still on the default[test]tag shows test configs- Press
Enteron a config to activate it
Press a to add one. Adding a config is the one operation that is interactive only — noorm config add on the CLI directs you here:
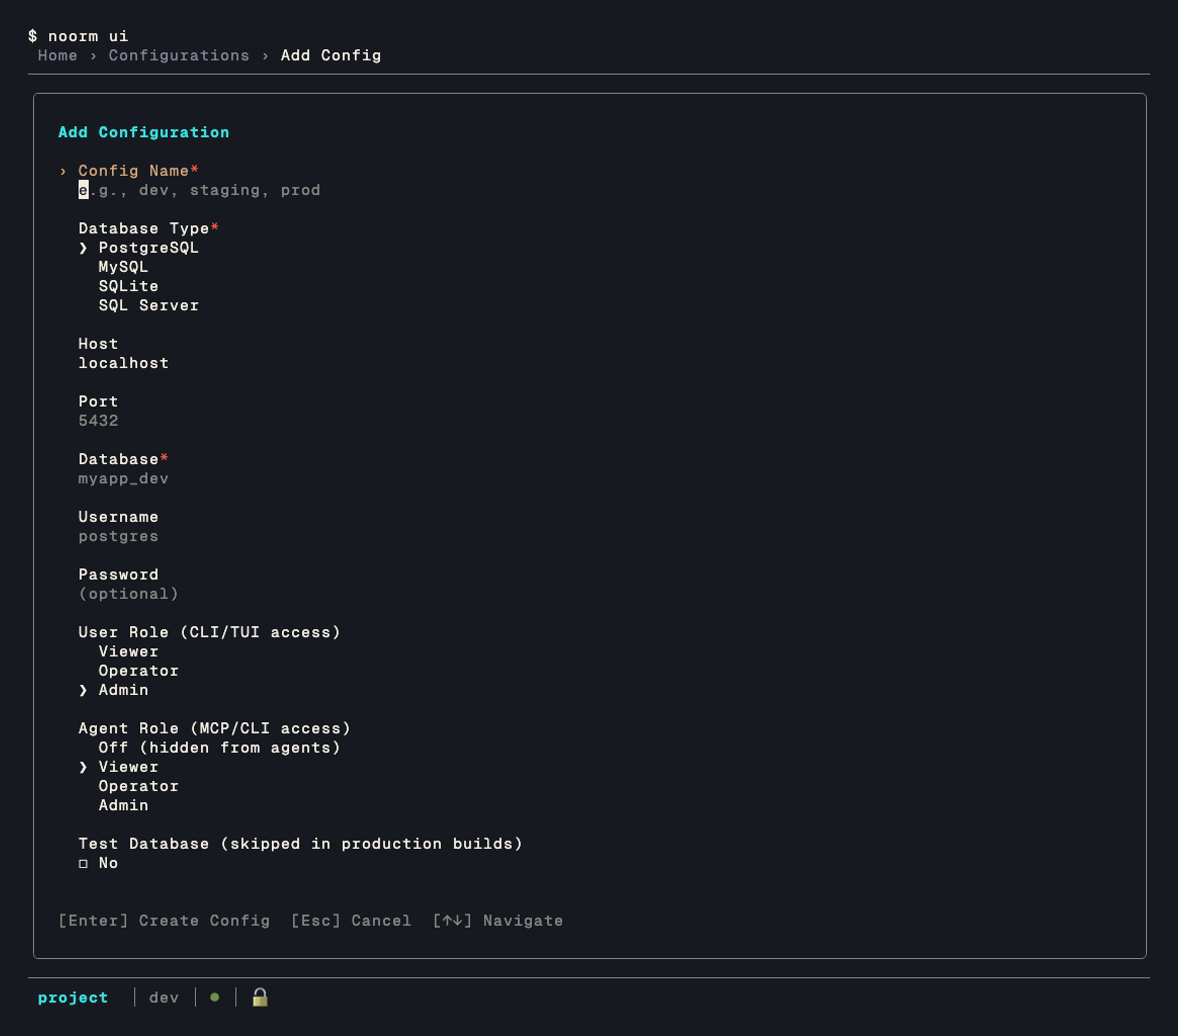
The two role fields set access per channel — who is driving. User Role covers a human on the CLI, TUI, or SDK; Agent Role covers an AI agent, over MCP and the CLI alike. They are independent, so a config can be wide open at your terminal and read-only — or invisible — to an agent. New configs default to admin for you and viewer for the agent. See Configs for what each role permits.
Changes List
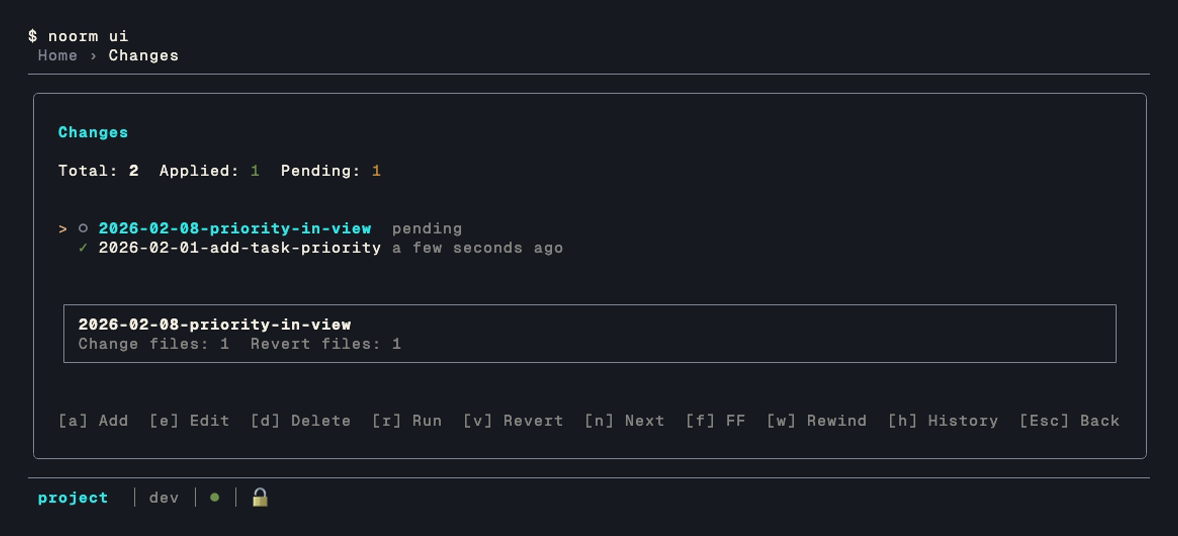
✓= Applied○= Pending✗= Failed
When no changes exist:
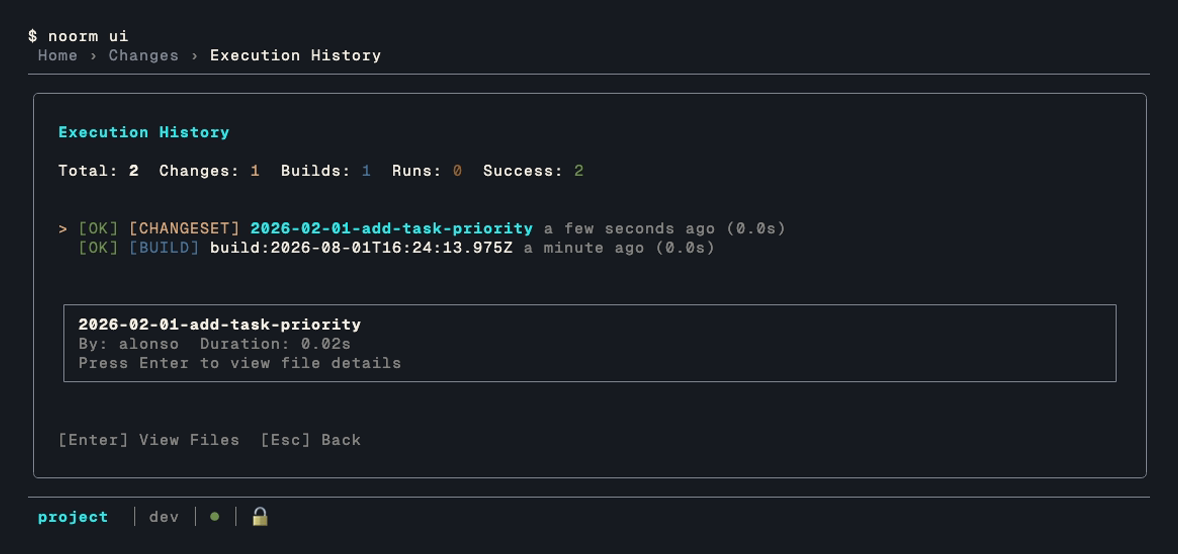
No changes found. Press [a] to create one.Press h for the execution history — what ran, when, and who ran it:
Run Menu
Database Menu
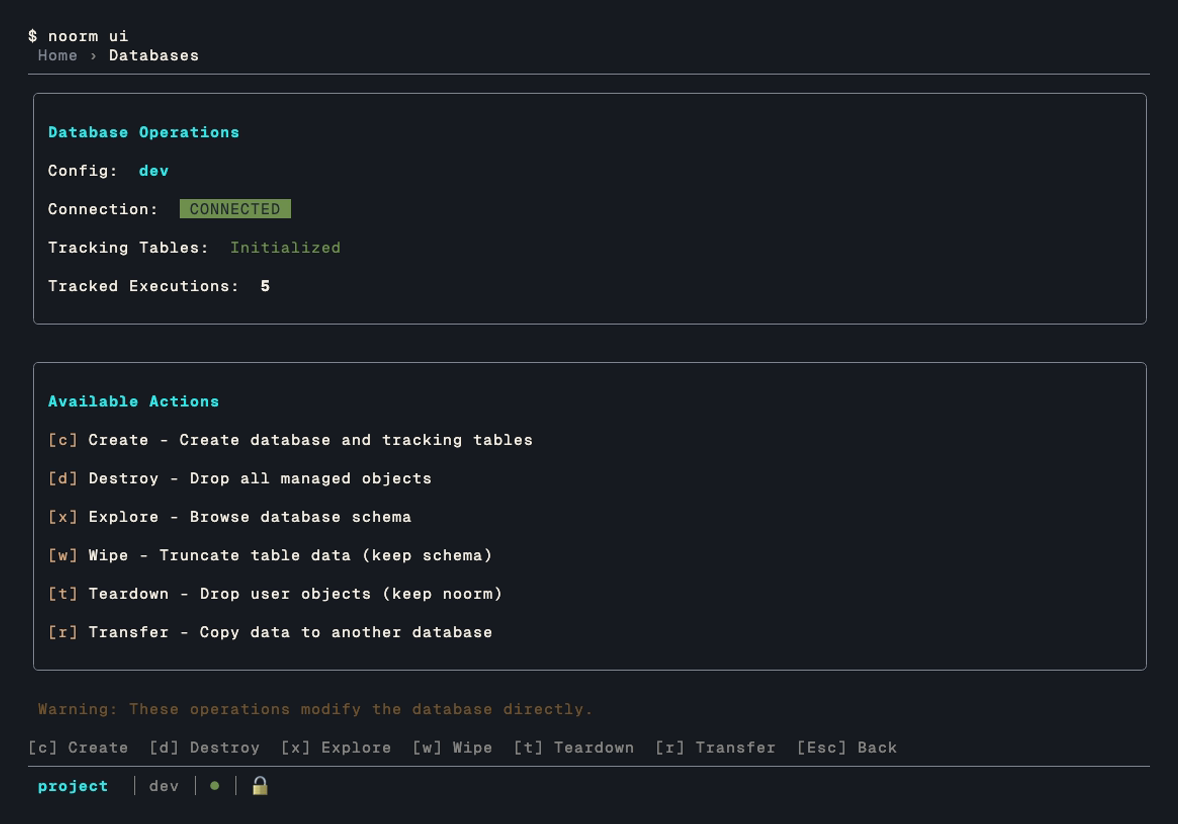
Schema Explorer
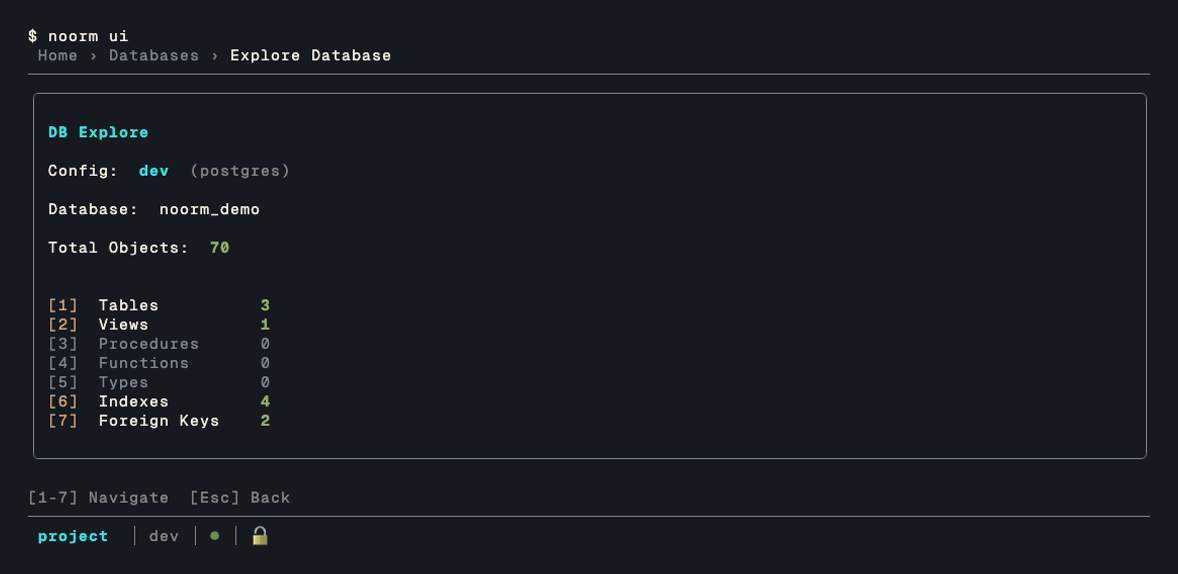
Press a number to drill into a category:
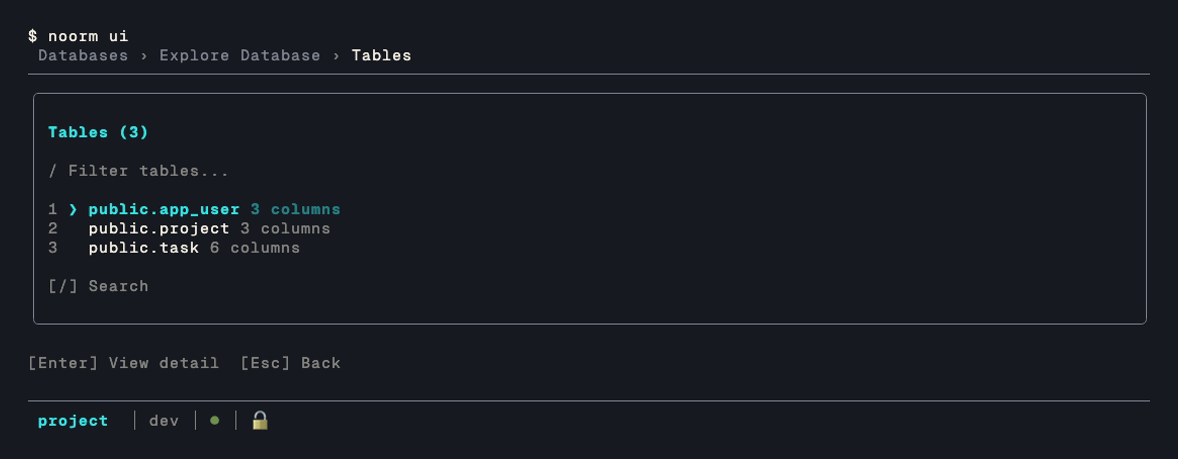
Select a table to see its full schema:
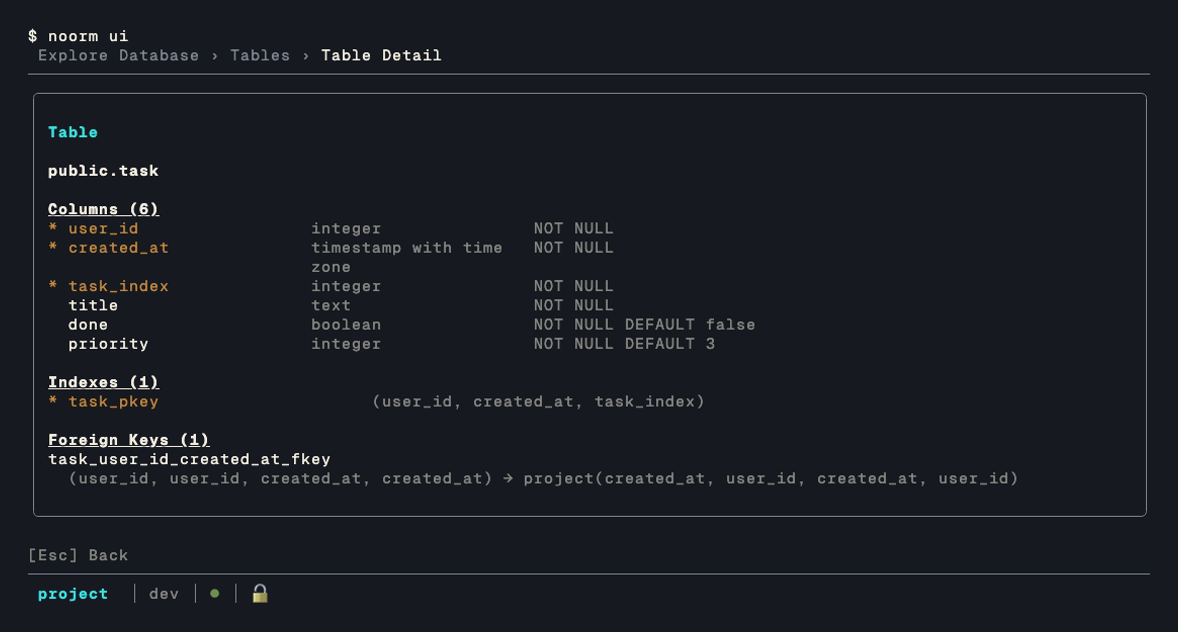
A detail longer than the window scrolls rather than running off the bottom:
| Key | Action |
|---|---|
↑ ↓ | Scroll one line |
Ctrl+U / Ctrl+D | Half a page |
PageUp / PageDown | A full page. On macOS these are fn ↑ and fn ↓, which is what the footer says there |
Home / End | Top, bottom |
v | Redraw the same rows with nothing truncated |
r | Read rows from the object |
The footer lists only the keys the current screen answers to, so a detail that fits shows no scroll hints and a view shows no [r] Rows.
Reading Rows
The explorer describes structure. r on a detail screen reads the rows themselves, without leaving the explorer for the SQL terminal:

The peek reads both ends of the table rather than a page from the top, so the last rows by primary key are as reachable as the first:
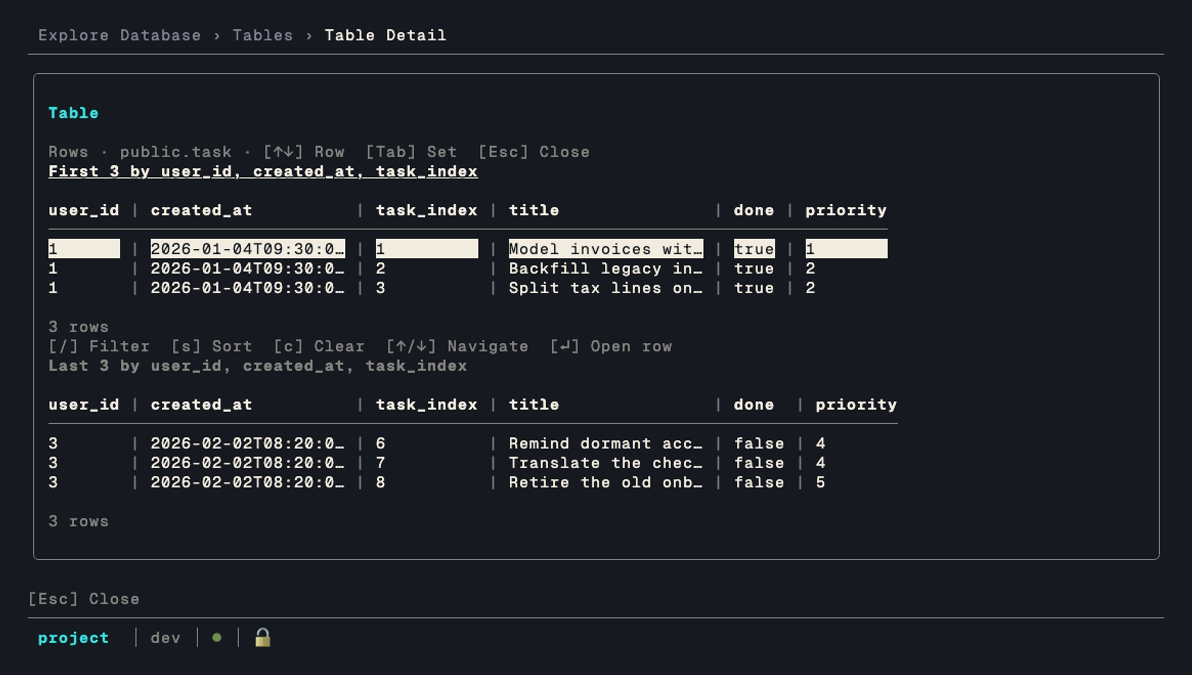
| Key | Action |
|---|---|
↑ ↓ | Move the cursor within a set |
Tab | Swap between the first set and the last |
Enter | Open the highlighted row as a document |
/ s c | Filter, sort, clear, on the focused set |
Escape | Close the peek |
Three things decide what comes back:
- Reading rows needs
sql:read, not theexplorepermission the rest of these screens use. A config an agent may inspect the schema of is not one it may read data from. See Configs. - The tail needs a primary key. With one, the last rows ride the index. Without one, only the first rows appear.
- A short table is one set. When both ends meet, the peek says
All N rowsand draws a single table.
The table fits as many whole columns as the terminal holds and marks the rest … N more columns. Enter on a row is what shows them all:
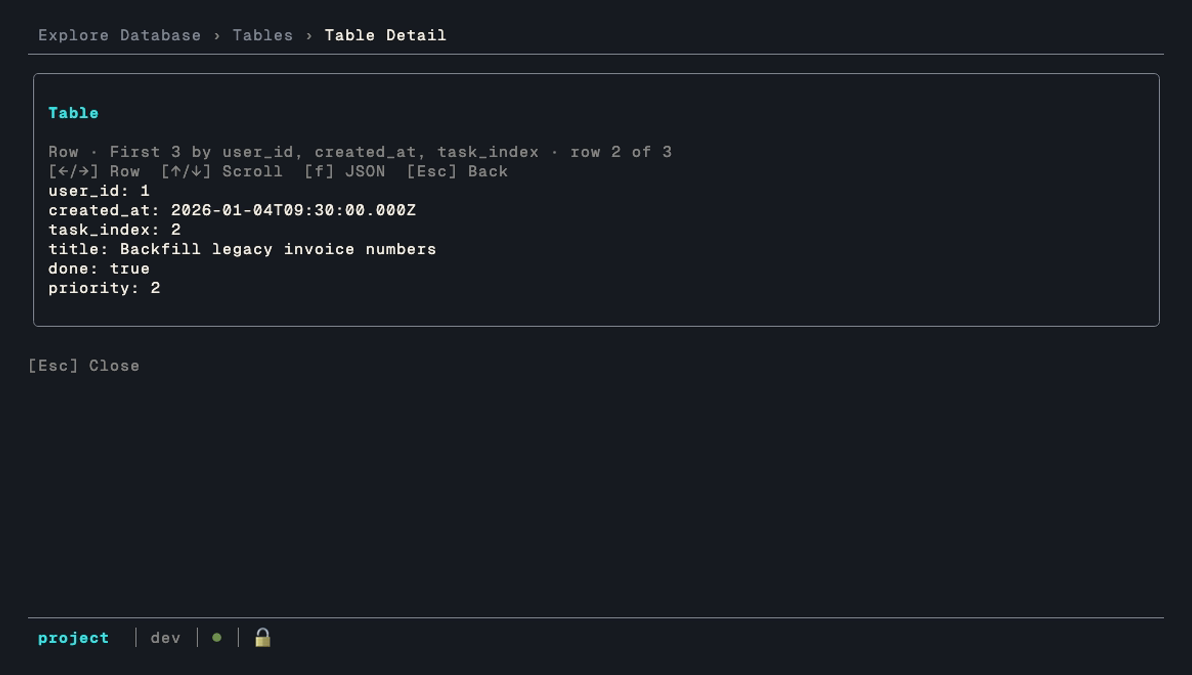
| Key | Action |
|---|---|
← → | Previous row, next row, in the order the table was showing |
↑ ↓ | Scroll a document taller than the window |
f | Swap YAML for JSON. The choice holds for the rest of the session |
Escape | Back to the peek, on the row you were reading |
SQL Terminal
Press Shift+Q anywhere to open the SQL terminal against the active config:
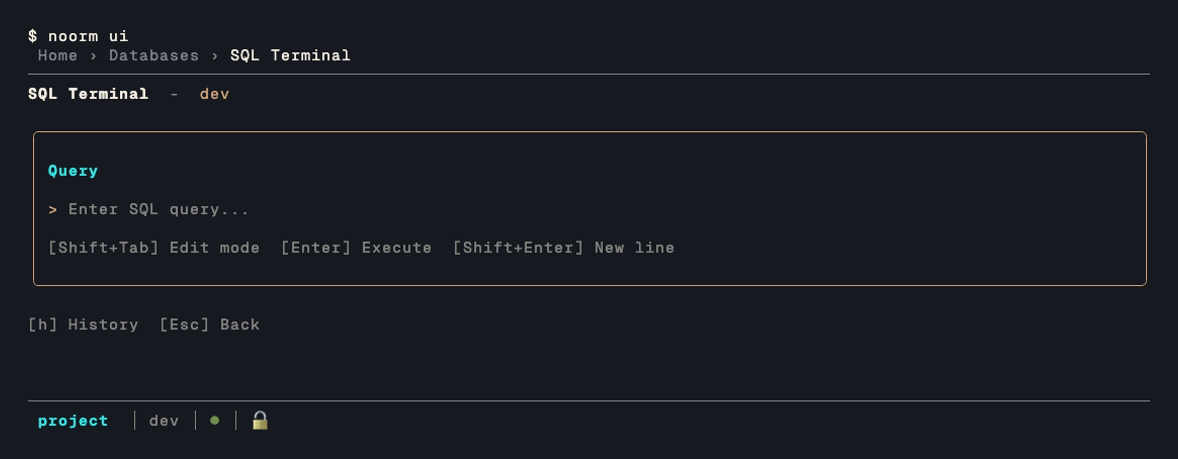
↑↓walk your query history, andhopens it as a list- A result wider than the terminal keeps whole columns and marks the remainder
… N more columns, rather than cramming every column into a few characters Enteron a result row opens it as a document, the same YAML or JSON view the row peek uses, which is how you read the columns the grid left out
Log Viewer
Press Shift+L anywhere to toggle the log overlay:
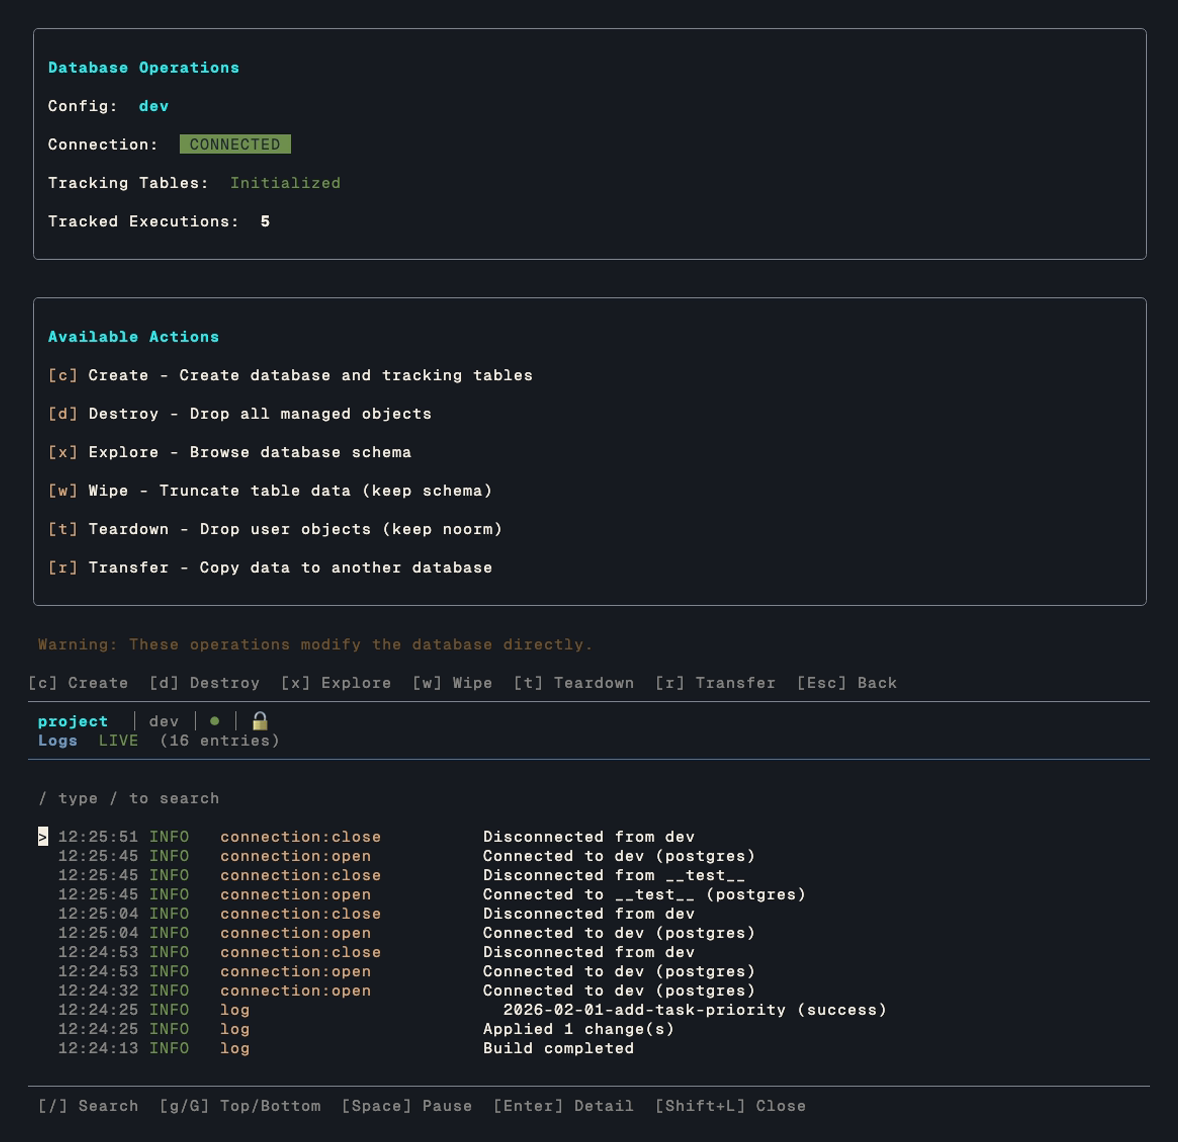
The overlay tails events as they happen, so you can watch an operation run. [/] searches, [g] and [G] jump to the top and bottom, [Space] pauses the tail, [Enter] opens a single entry in full, and Shift+L again closes it.
More Options
Press + from home for the screens that aren't part of the day-to-day loop:
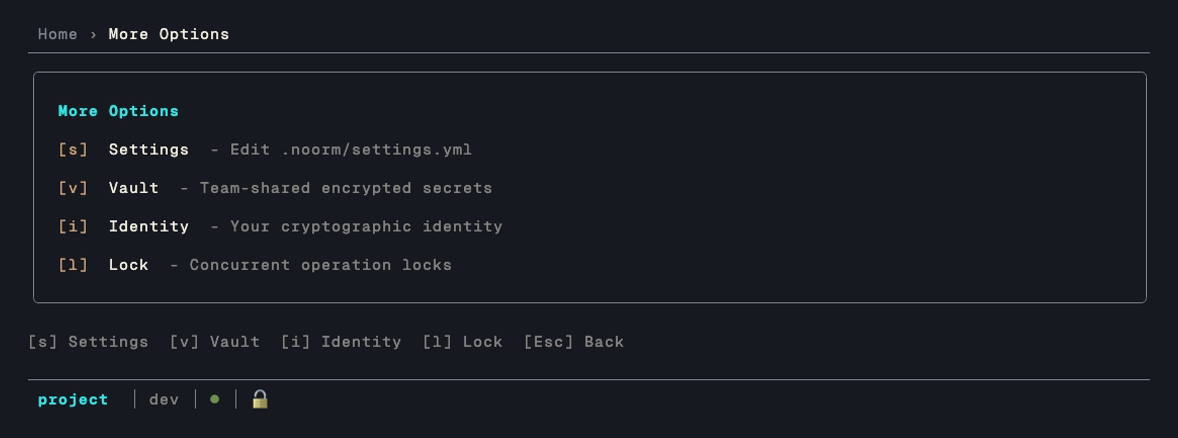
Each of these also has a direct key from home — + just groups them.
Settings
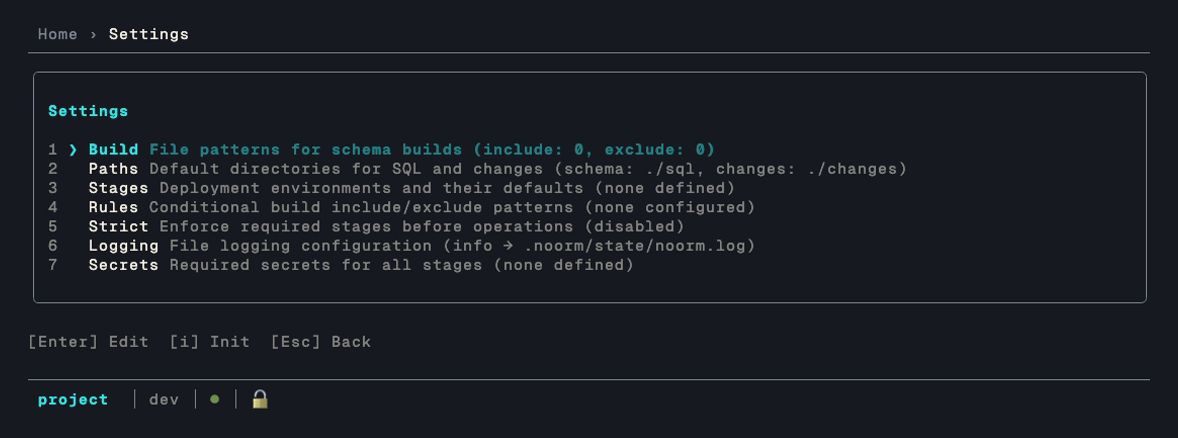
Edits here write to .noorm/settings.yml. Press i to create that file if the project doesn't have one yet. See Configs and SQL File Organization for what each group controls.
Identity
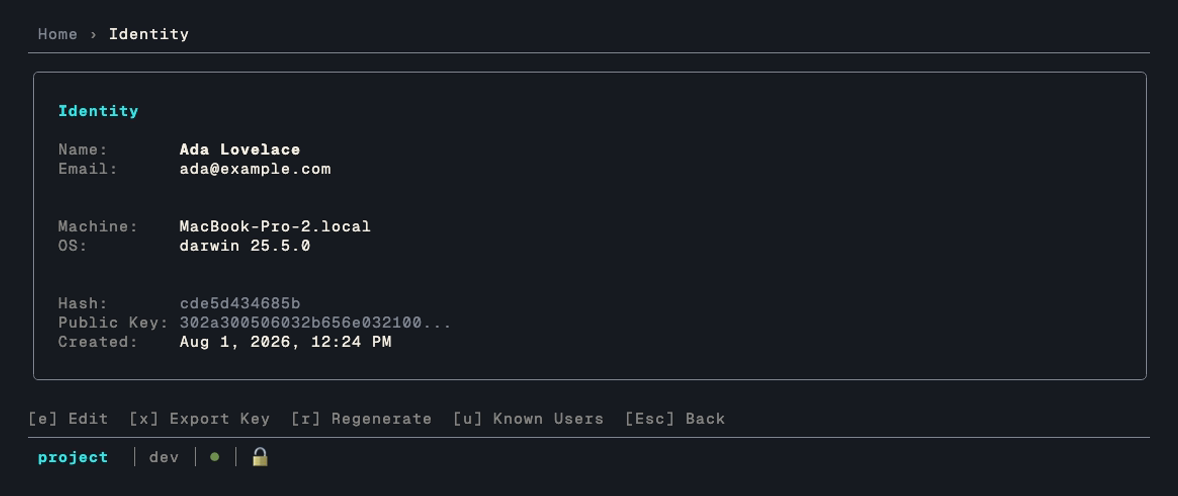
Your identity signs your name to every change execution, which is what makes change history attributable across a team. It lives in ~/.noorm/, not in the project, so it follows you between repositories.
Vault
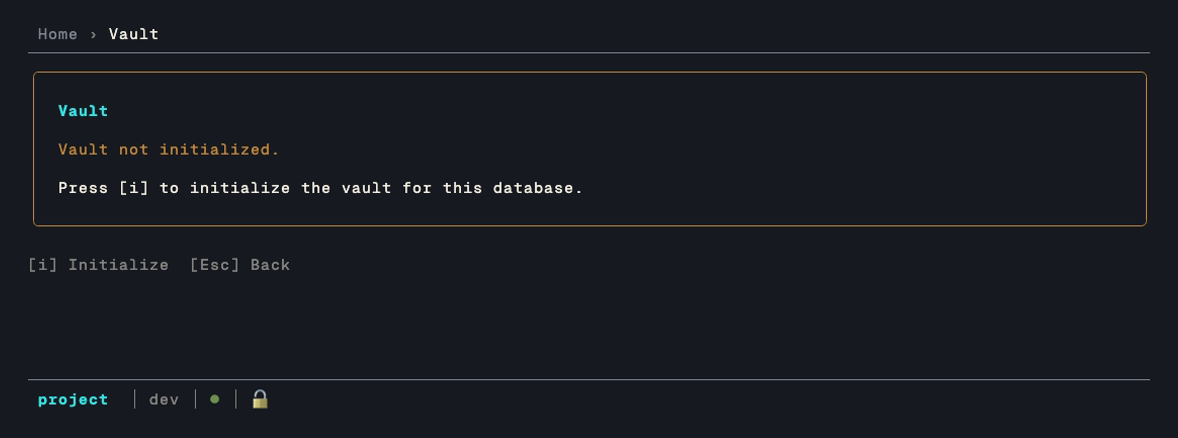
The vault holds team-shared encrypted secrets in the database itself, so teammates get them by connecting rather than by copying a .env around. It starts uninitialized — press i to create it. See Vault.
Secrets
Per-config secrets are reached with k from the config list, not from home — they belong to a config rather than to the project:
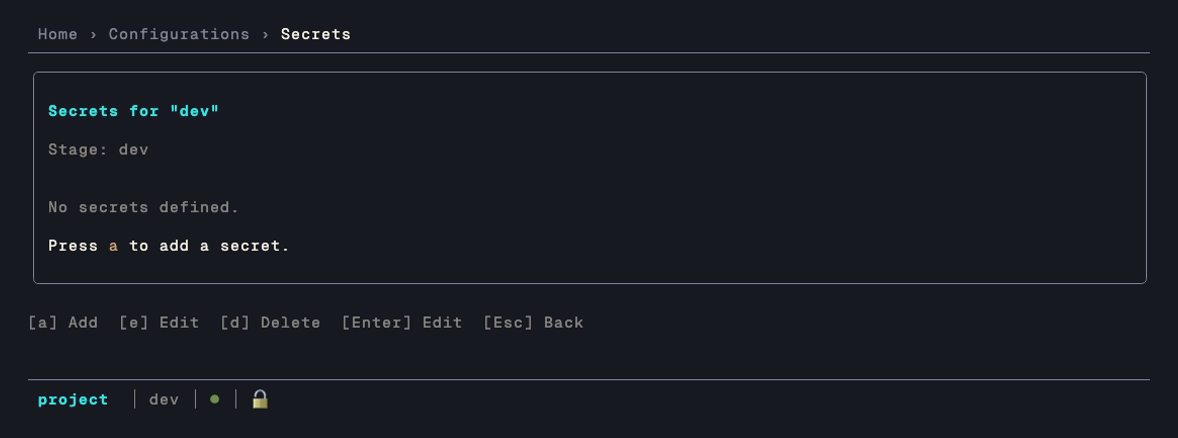
These are values a config needs at connection or render time. See Secrets for how they resolve against stages.
Lock
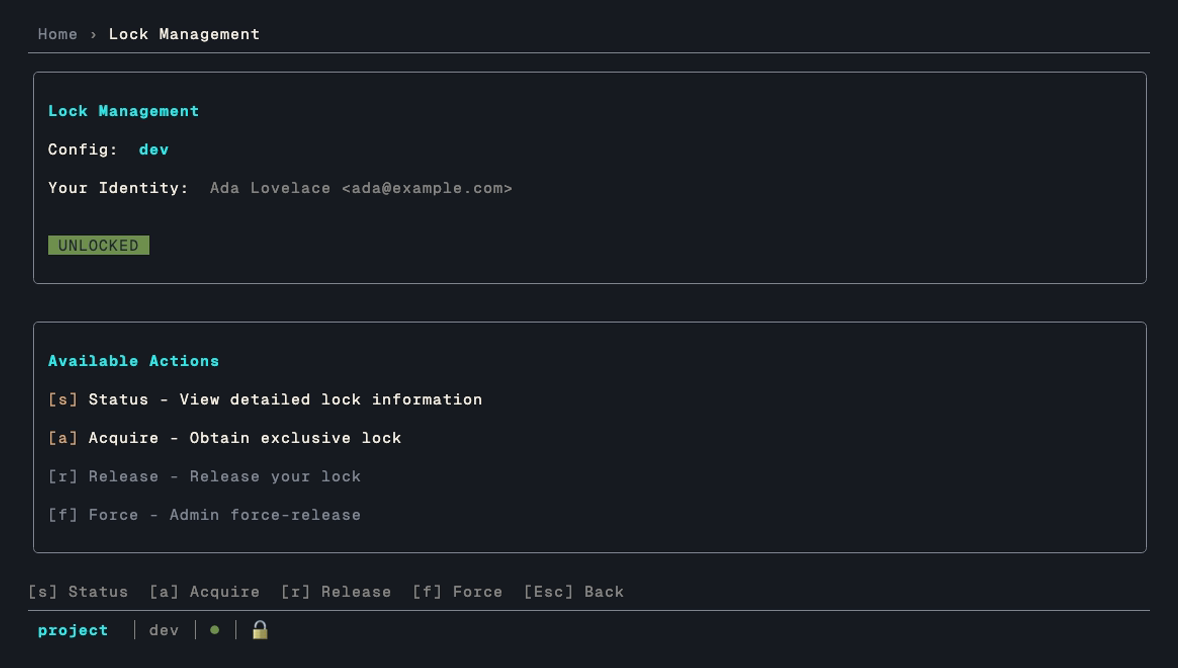
noorm takes a lock around operations that write to the database, so two people running a build against the same environment don't interleave. [s] shows status, [a] acquires, [r] releases, and [f] force-breaks a stale lock. See Locking.
Update
Press u from Home to check GitHub releases for a newer noorm. [i] installs an update if one is available, [r] re-checks, and esc goes back.
The binary runs to around 70MB, so the install reports where it has got to rather than leaving you watching a spinner. Below the spinner you get the byte count as 42.0 / 73.0 MB (57%), and a progress bar tracking the same percent. When the server sends no Content-Length there's nothing to measure against, so the count drops to a bare 9.0 MB received and the bar is omitted rather than sitting at zero.
If a download stalls and resumes, a yellow line names why and which attempt it's on, for example download stalled, no data for 30s — resuming (attempt 1/5).... Progress isn't reset by the retry, since it resumes from the bytes already on disk rather than starting the file over. The npm install path (npm install -g) owns its own output, so none of this applies there.
Tips
Quick Config Switching
From home, press c, arrow to the config you want, then Enter to activate it. The config list is not numbered, so the digits do nothing there:
c → ↓ → EnterEnter on the config that is already active opens its edit form instead.
Fast Forward All Changes
g → fRun Build
r → bCheck Connection
Validate lives behind [+] More on the config list:
c → + → v (validate highlighted config)Color Coding
| Color | Meaning |
|---|---|
| Green | Success, applied, active |
| Yellow | Warning, pending, in progress |
| Red | Error, failed |
| Gray | Skipped, unchanged |
| Cyan | Info, links |